
Decontamination process
Why this step is crucial in car detailing
7/19/20252 min read
1. Introduction – Decontamination as a Prerequisite to Surface Correction
In professional detailing, decontamination isn't optional—it’s the foundation upon which all effective correction and protection processes rest. Whether prepping for a ceramic coating or refining a gloss enhancement package, a meticulously decontaminated surface ensures both performance and longevity.
This streamlined guide refines the process, highlighting each stage with an emphasis on product compatibility, dwell time efficiency, and contamination-specific protocols.
2. Diagnostic Assessment – Surface Condition & Contaminant Profiling
Before initiating the chemical phase, evaluate the vehicle’s exposure profile—urban fallout, brake dust saturation, resin layering, or recent construction debris all require tailored responses.
Use visual inspection and tactile evaluation (post-wash) to segment the surface into zones requiring targeted treatment (e.g., rail dust on horizontal panels vs. tar on rocker panels).
3. Pre-Decon Prep – Precision Pre-Wash Protocols
Begin with a structured pre-wash using citrus-based degreasers or surfactant-rich APCs on high-impact areas. Follow with high-foaming pH-neutral snow foam to lift organic matter.
A touchless rinse maximizes visibility for embedded contaminant detection without introducing marring. This step ensures fallout removers and solvents aren’t wasted combating superficial grime.
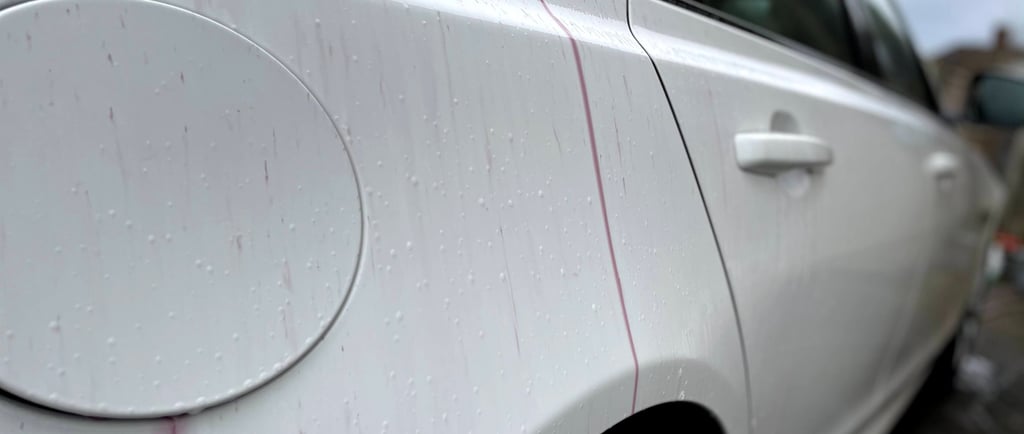
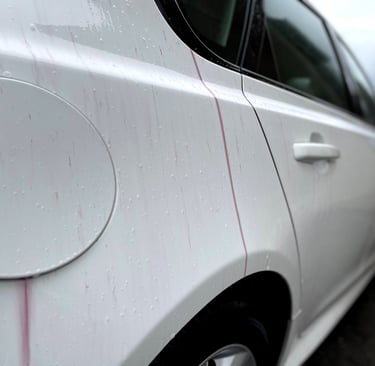
4. Ferrous Contaminant Removal – Iron Fallout Neutralisation
Apply a high-reactivity fallout remover to all painted and glass surfaces, including wheels. For maximum reactivity, work in ambient temperatures below 25°C and avoid direct sunlight.
Monitor chromogenic response (typically purple) and agitate only when necessary with a microfibre applicator or synthetic clay sponge. Avoid cross-reactivity with acid-based cleaners. Rinse thoroughly.
5. Tar & Adhesive Removal – Targeted Solvent Protocols
Next, deploy a solvent-based tar remover, focusing on wheel arches, lower quarters, and door shuts. Apply via controlled spray or microfibre applicator for precise contact.
Observe flash time—ideally 1–3 minutes—before controlled agitation. Avoid overlapping with plastic trim where risk of staining exists. Rinse or neutralise residue with citrus-based wash solution.
6. Clay Media Application – Mechanical Bonded Particle Extraction
Where chemical decontamination plateaus, mechanical means finish the job. Use a mild- to medium-grade clay bar or clay mitt with a dedicated clay lubricant or diluted quick detailer.
Segment the vehicle panel by panel, maintaining light, linear pressure. Avoid circular motion. Inspect and knead clay frequently to reduce load-induced marring.
7. Ancillary Surfaces – Glass, Plastics, Wheels & Trim
Glass should undergo identical fallout and tar treatments for optimal hydrophobic performance under coatings. For matte or textured plastic trims, avoid solvent saturation—use panel wipes sparingly.
Wheels may benefit from a dedicated wheel clay if prepping for ceramic coating. Inspect tyre walls for residue before applying dressing or sealants.
8. Decon Rinse & Surface Neutralisation
Following decontamination, perform a thorough rinse and pH-balanced shampoo wash. This removes chemical residues and rebalances the surface prior to polishing or protection.
If working on sensitive finishes (e.g., matte wraps), follow with isopropyl or water-based panel wipe diluted to spec, ensuring no ghosting or gloss streaks appear.
9. Post-Decon Inspection – Light-Aided Paint Readiness Check
Use diffused LED inspection lighting to assess surface readiness for polishing. Check for clay marring, bonded particulates missed during fallout removal, or inconsistent lubricant wipe marks.
This step also helps identify areas where RDS correction may be warranted prior to protective product application.
10. Integration with Correction & Protection Workflow
Once decontamination is complete, surface is now appropriately prepped for machine polishing, hand correction, or immediate ceramic coating application.
Maximizing coating longevity or sealant bonding requires this baseline purity. Skipping or rushing this phase undermines both protection and aesthetic durability.